Four Tools to Schedule Instagram Posts.
From deciding what should you post to posting the right content, you need tons of time to make it happen.
Posting content regularly is the most essential thing if you want to grow your account constantly.
Is there any way to ease down the process of posting content on social media like Instagram?
In this article, I’m gonna break down how you can automate your posting content on the platform and schedule the content.
As I already covered lots of things on the most trending platform these days! Yes, it’s Instagram.
It’s the largest social networking website and application and has more than one billion active users.

If you want to stay connected with your loved ones and want to grow your audience then you must need to consider the platform.
Instagram is easy to use, all you need to create a free account and start using the platform.
Using Instagram is extremely simple, all you need to post visual content, which may be images or videos with relevant hashtags, and captions are the most important things while posting the content.
If you want to make a passive income then you need to consider the platform.
You can make a good amount of passive income.
You can work as an influencer and can start promoting other companies’ products and can charge whatever you want.
If you’re a business owner and want to grow your customers then it’s the best platform for you to grow your business.
Either you can create a personal account or you can create a business account. You can also convert your personal account into a business one.
The first and most important thing is if you want to make a good amount of money with the platform, whether you have a business account or a personal account, you need to be consistent.
You need to post the content on a regular basis is a super important thing.
You can’t miss out on that.
Sometimes it’s a challenging task if you have a business or you are stuck with other things to post the content regularly.
Yes, most people complain that they don’t have enough time to manage social accounts.
Don’t worry, you don’t need to hire any guy to do these things on a regular basis.
In this article, I’m gonna share with you some of the tools and their work and explain in detail how you can take benefit of these tools to schedule posts on a regular basis.
Make sure before using any third-party tools and applications, you first need to convert your personal Instagram account into a business account.
Read more about these topics:
How to Know My Direct Message on Instagram Read or Not
Secrets to Get More Instagram Video Views
Tools and their functionality explain:
1. Buffer tool:
Buffer is the most amazing social media management tool you can use for scheduling your daily Instagram posts.
Installing and using the buffer tool is super easy.
In this session, I’m gonna break down how you can set up the buffer account and start using the buffer.
First, you need to go to the official website of the buffer i.e. www.buffer.com.
After reaching the website you need to click on the SignIn button.
After clicking on the SignIn button, now you need to click on the Create an account button and it’ll ask you to enter your working email and create a password.
You have two options, either you can use the buffer for your personal use only or you can use it for your business profile.
If you want to manage 20-30 social profiles then you need to purchase the plan but if you’re thinking of using it for personal use then you can use the personal plan.
First, you need to create an account. After that, you need to log into your buffer account.
Steps to schedule after creating an account:
1. First, you need to log into your buffer account. After login, you’ll see this type of screen as shown below.

2. You can see first you need to connect your social account with the new buffer version.
To add the account you need to click on the Connect account button icon and it’ll ask you to select which platform you want to connect.
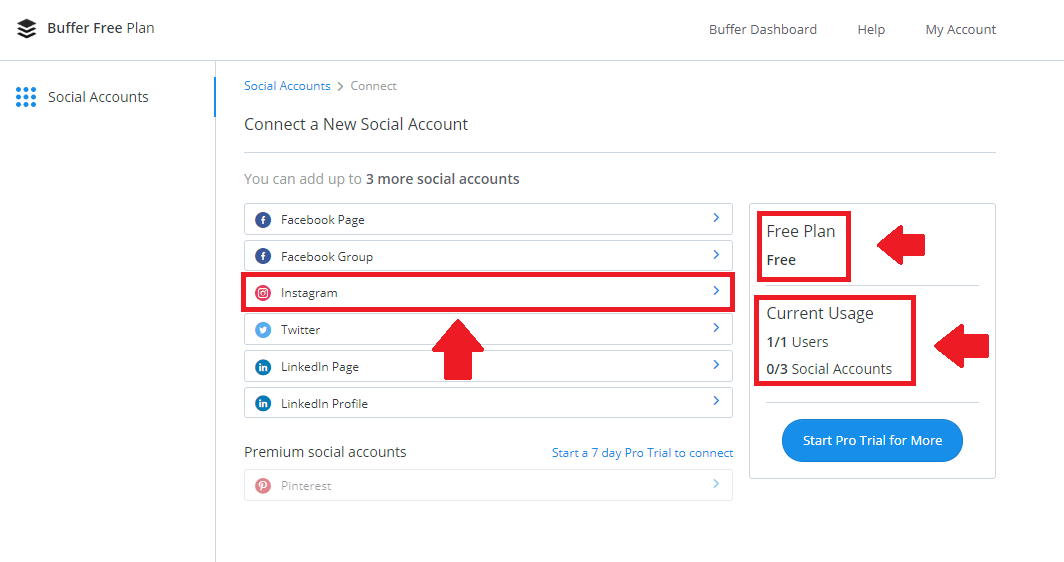
3. As you can see if you’re using the free plan, you can connect up to 3 accounts only and there is a limitation in scheduling and posting the content.
If you click on the Start Pro Trial for More tab then it’ll activate your all social platforms for 7 days and you can use all the social platforms for 7 days.
Beyond the limit, you need to pay for that and need to purchase the paid version of the buffer.
4. Suppose you’re using the free plan and you can connect the 3 accounts only then it’s a recommendation for you to connect only those accounts that actually give you more benefits.
Since we’re talking about Instagram that’s why now I’m gonna connect the Instagram and Facebook page.
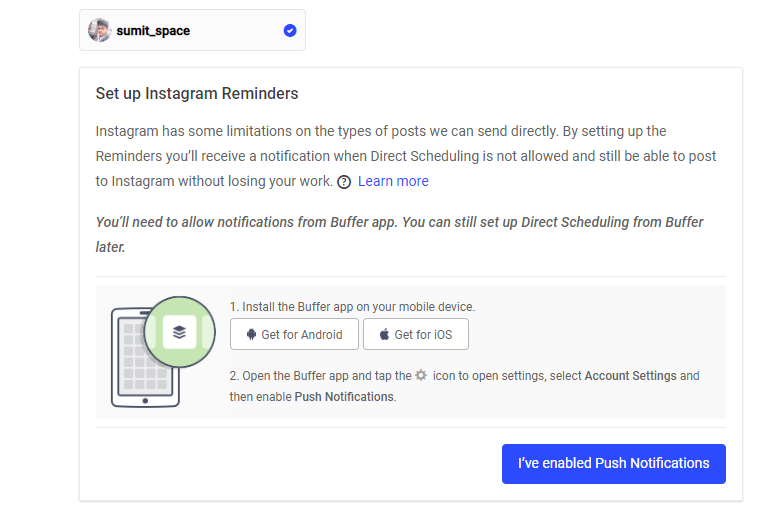
As you can above when you’ll try to connect the buffer with your Instagram it’ll ask you to download the buffer application on your smartphone device.
5. To connect the account click on that icon and it asks you to put in your login details.
By putting up the details now it’ll ask you to authorize the buffer with your social page.
6. As you can see the buffer is suitable for the Facebook page, Facebook group, Instagram, Twitter, LinkedIn page, LinkedIn group, and Pinterest.
These are the social accounts that you can connect with. Pinterest is paid.
If you’re looking to connect the Pinterest account then you need to purchase the plan.
7. After connecting the account, you’ll see that type of screen as shown below.
As you can see there is not any direct sharing option with the buffer for Instagram.
Instagram doesn’t allow you to share the content directly with any third-party application.
Buffer and any other application can’t share the content directly rather they’ll send you a notification on the mobile application (the app you’ll download like Buffer you can find on the PlayStore and AppStore).
After receiving the notification on your mobile device because of the buffer app it’ll ask you to share the content manually.
Any third-party application can remind you of sharing the content but they can’t directly share from the platform on Instagram.
8. As you can see the default posting time. You can change this time as per your need.
To change the time, you need to go to the settings and change the default time as per your need.
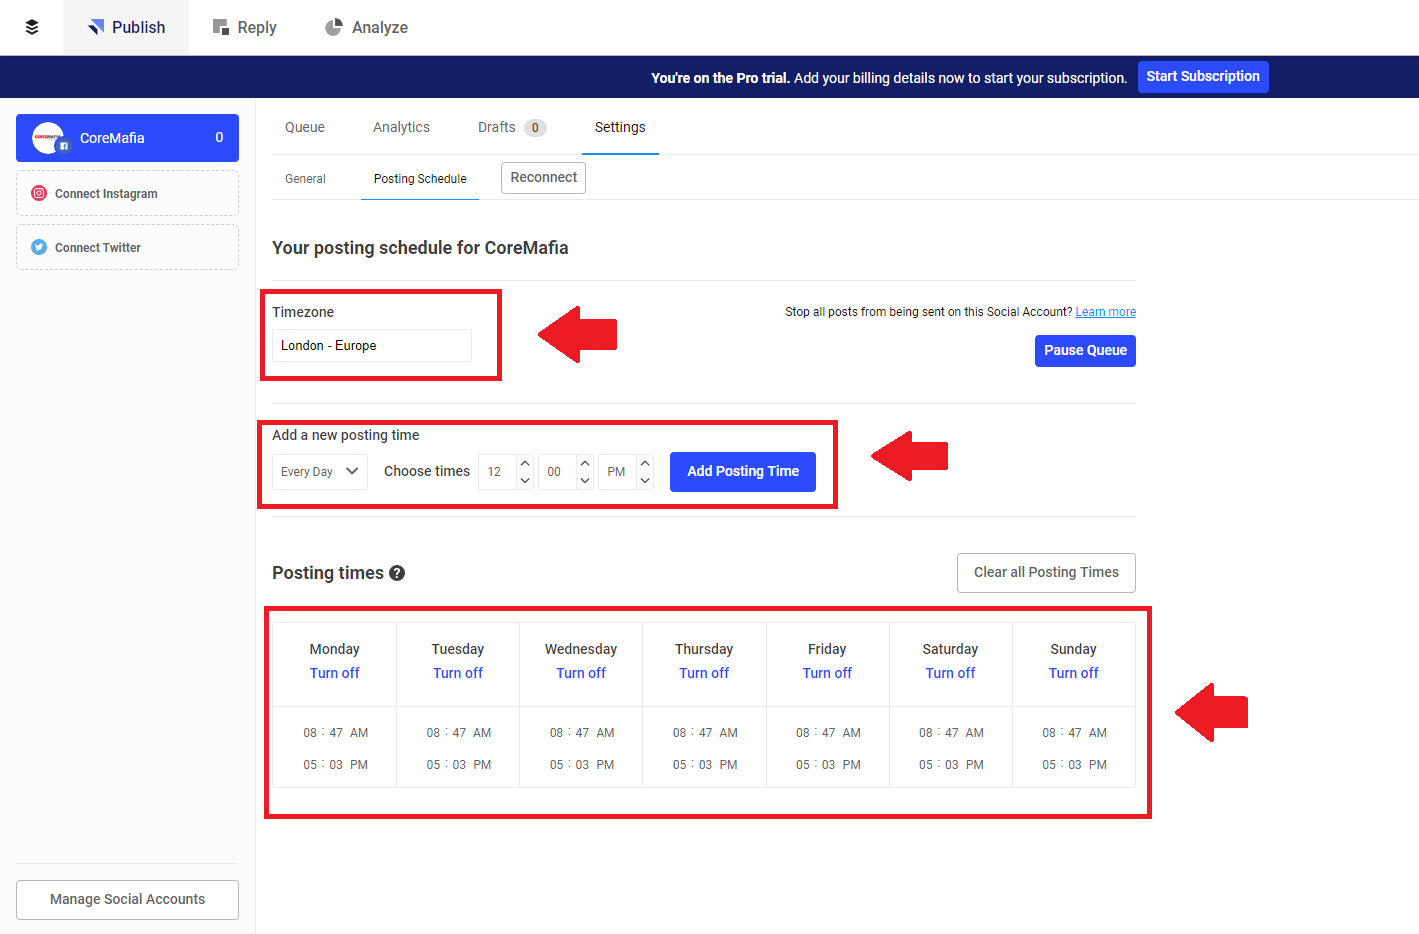
As you can see from the above screenshot you can change your schedule settings.
It’s your default schedule settings, you can change it according to your posting times.
Also, you can change the timezone according to your country-specific.
9. Now you must upload the content you want to share or schedule with the buffer application.
You can upload the content directly from your laptop or PC. Even you can also upload the content from your mobile application you’ll download from the AppStore or PlayStore.
Now you need to put the relevant hashtags and captions for your Instagram post.
You’ll see options either you can share the content now or you can schedule the post.
You can also add the content inside the queue. It means the content will be posted next to your already scheduled content.
These are the steps for sharing the content with the buffer application.
Now you can see there are tons of other options are there. You can see the analytics tab where you can measure your performance.
How things are going and how you can make it even better?
You can decide which type of content is performing the best.
Later you can make the same strategy and share the same kind of content to get more reach and engagement.
You can see the settings tab where you can see 3 more options.
The first option says you can change your URL structure.
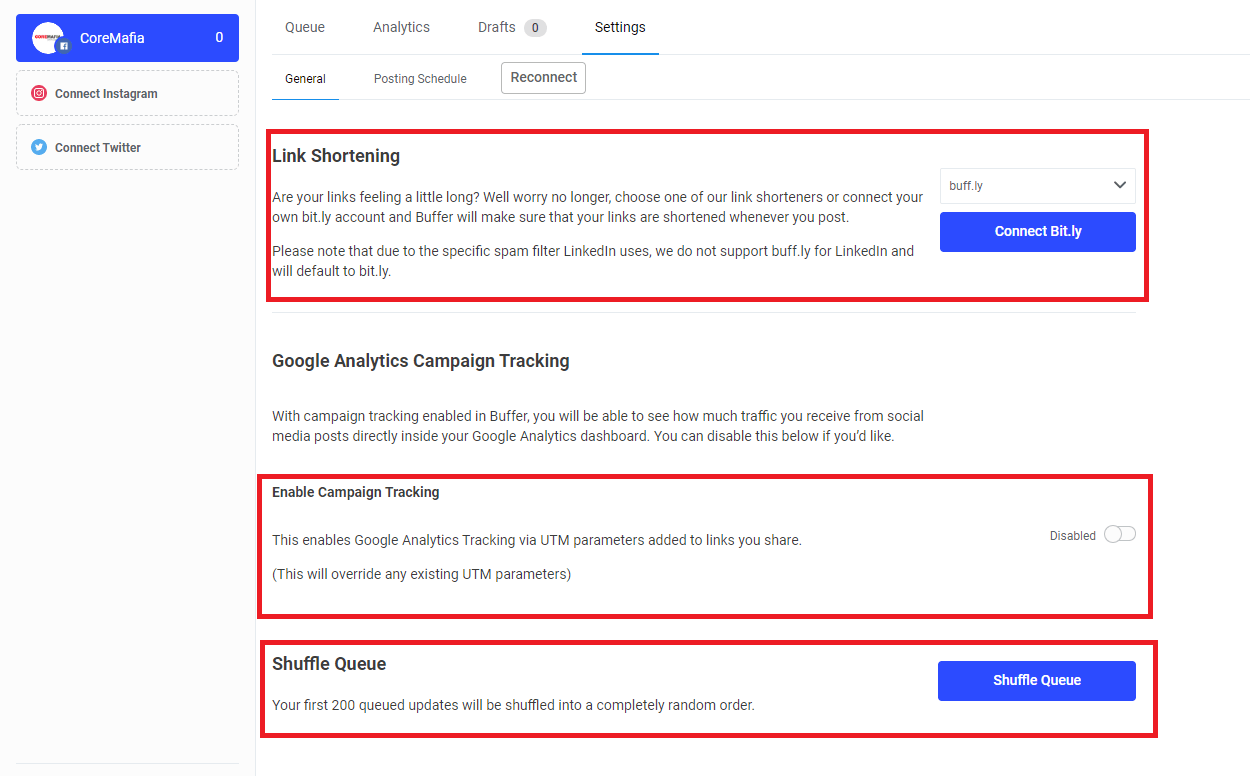
If you’re thinking that you have a long URL and you want to shorten that URL into a small one then you can simply select the shortened URL service.
When you post the content, instead of your big URL buffer will share the custom short URL.
The second option you can see, you connect your Google Analytics account.
You can track how your performance going on, and how much traffic you’re getting from social sites.
The last option, you shuffle the post and randomize your scheduled Instagram posts.
You can set the automation reply also.
If someone comments on your post then you can set the automated reply where you can set down your replies.
If someone sends you that type of text then they’ll receive that type of reply etc.
You can set the automated response.
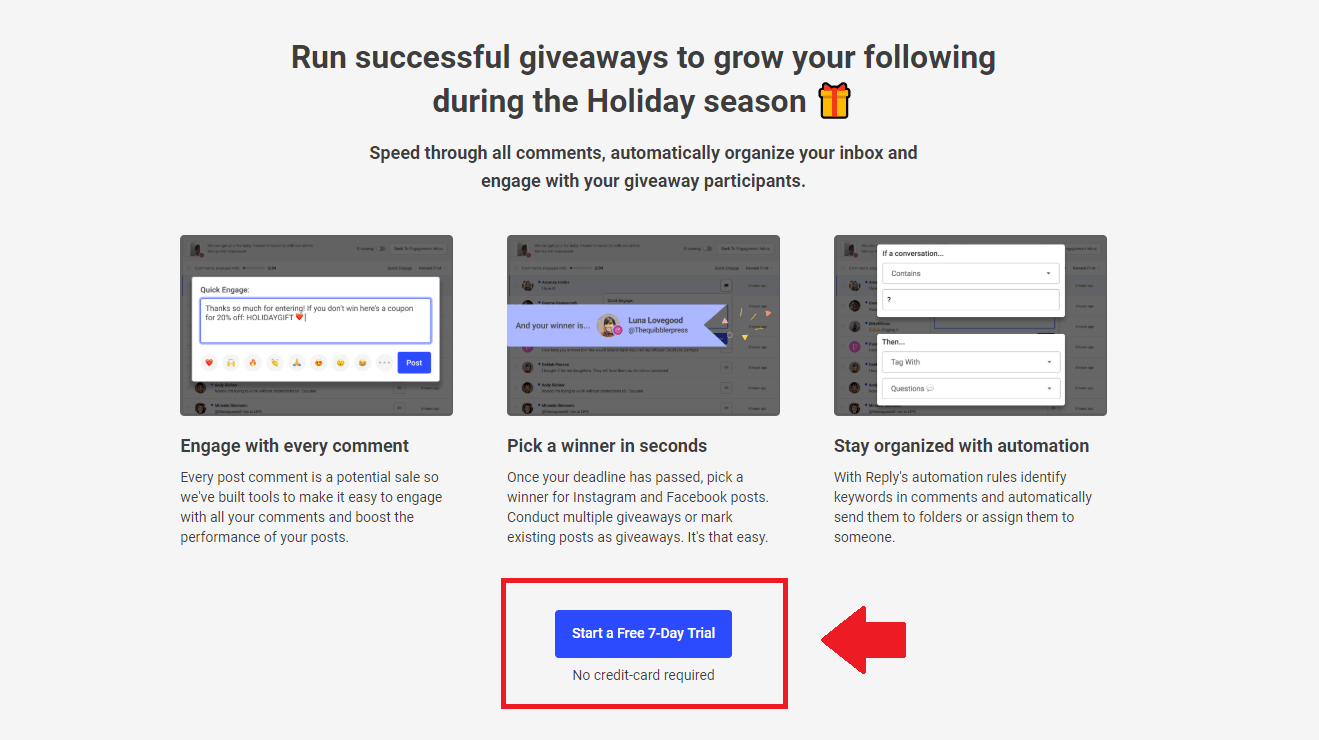
You can also set your free giveaways and organize and randomly pick the winners of the giveaway.
Most of the time on Instagram and other social platforms you need to organize a giveaway and you need to select the random people who won the giveaway.
You can set this with the buffer.
I personally use the buffer for scheduling and posting the content.
The primary reason behind using the buffer, it also comes with a Chrome extension.
You can see it in the image below.

You can directly add the extension in your Chrome browser and can easily schedule or directly share the content with your and other people’s websites.
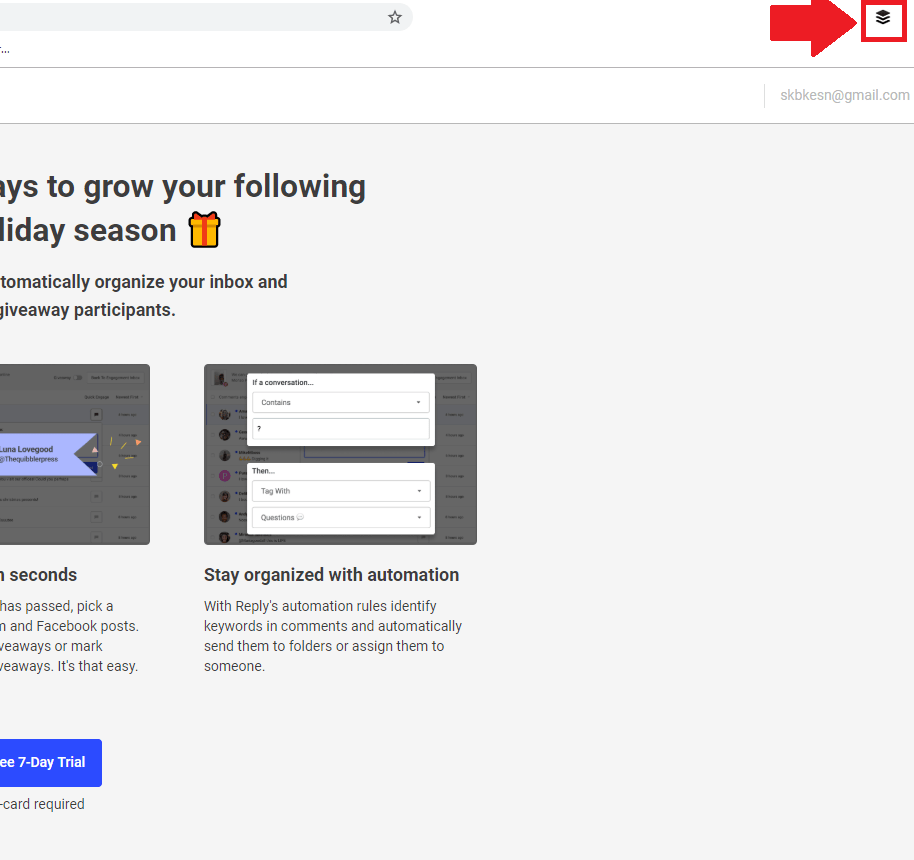
Sometimes it happens that you’re reading the content and suddenly you decide to share the content Then you can directly do that by clicking on the extension icon.

Either you can directly share the content with the buffer on all your social platforms at once or you need to share them one by one. The choice is yours.
Read more:
Ways to View Private Instagram Account
Why Isn’t My Instagram Account Loading Pictures
2. Later tool:
The second social media management tool you can use is Later.
Later the largest social media management tool was specially designed for Instagram.
Instead of Instagram, you can use this tool for Facebook, Twitter, and Pinterest.
Now in this session, I’m gonna share with you a deep inside about the tool. So let’s get started.
Here are the steps you need to follow:
1. First, you need to go to the official website Later by visiting www.later.com.
After reaching the website it’ll ask you to create an account.
Creating an account is easy, all you need to authorize the Later with the Instagram account and it’ll ask you to connect your Instagram account.
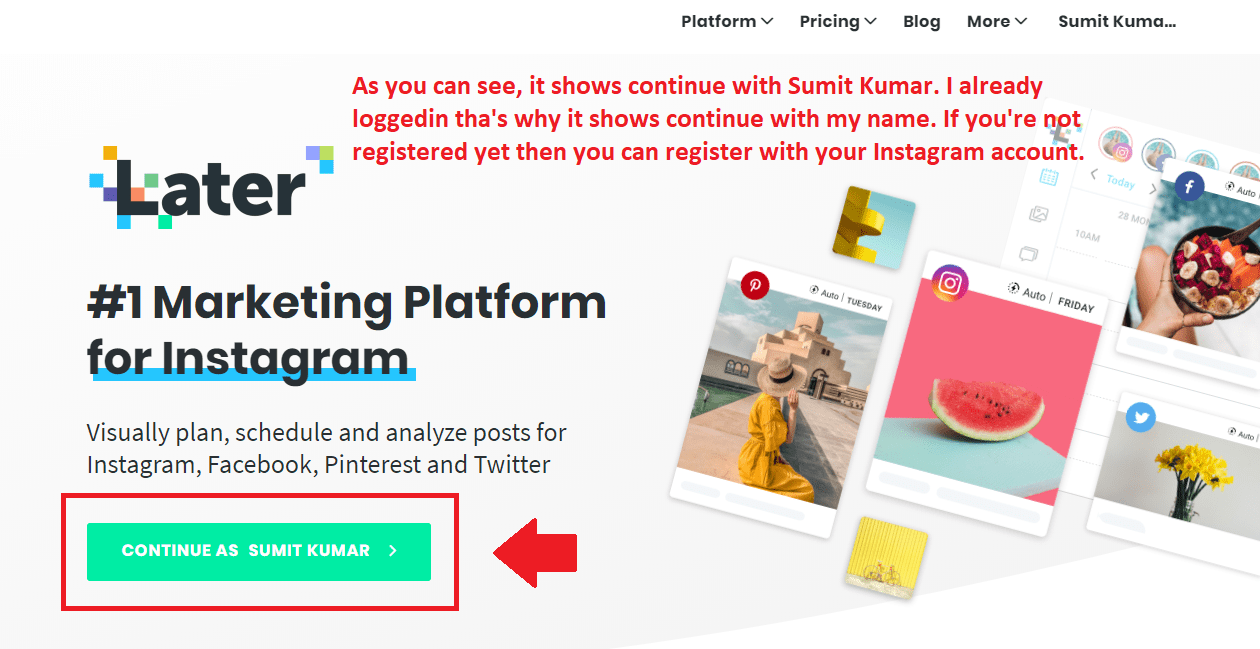
2. After connecting your Instagram account, you’ll see that type of screen as shown below. Now you have successfully created the account.
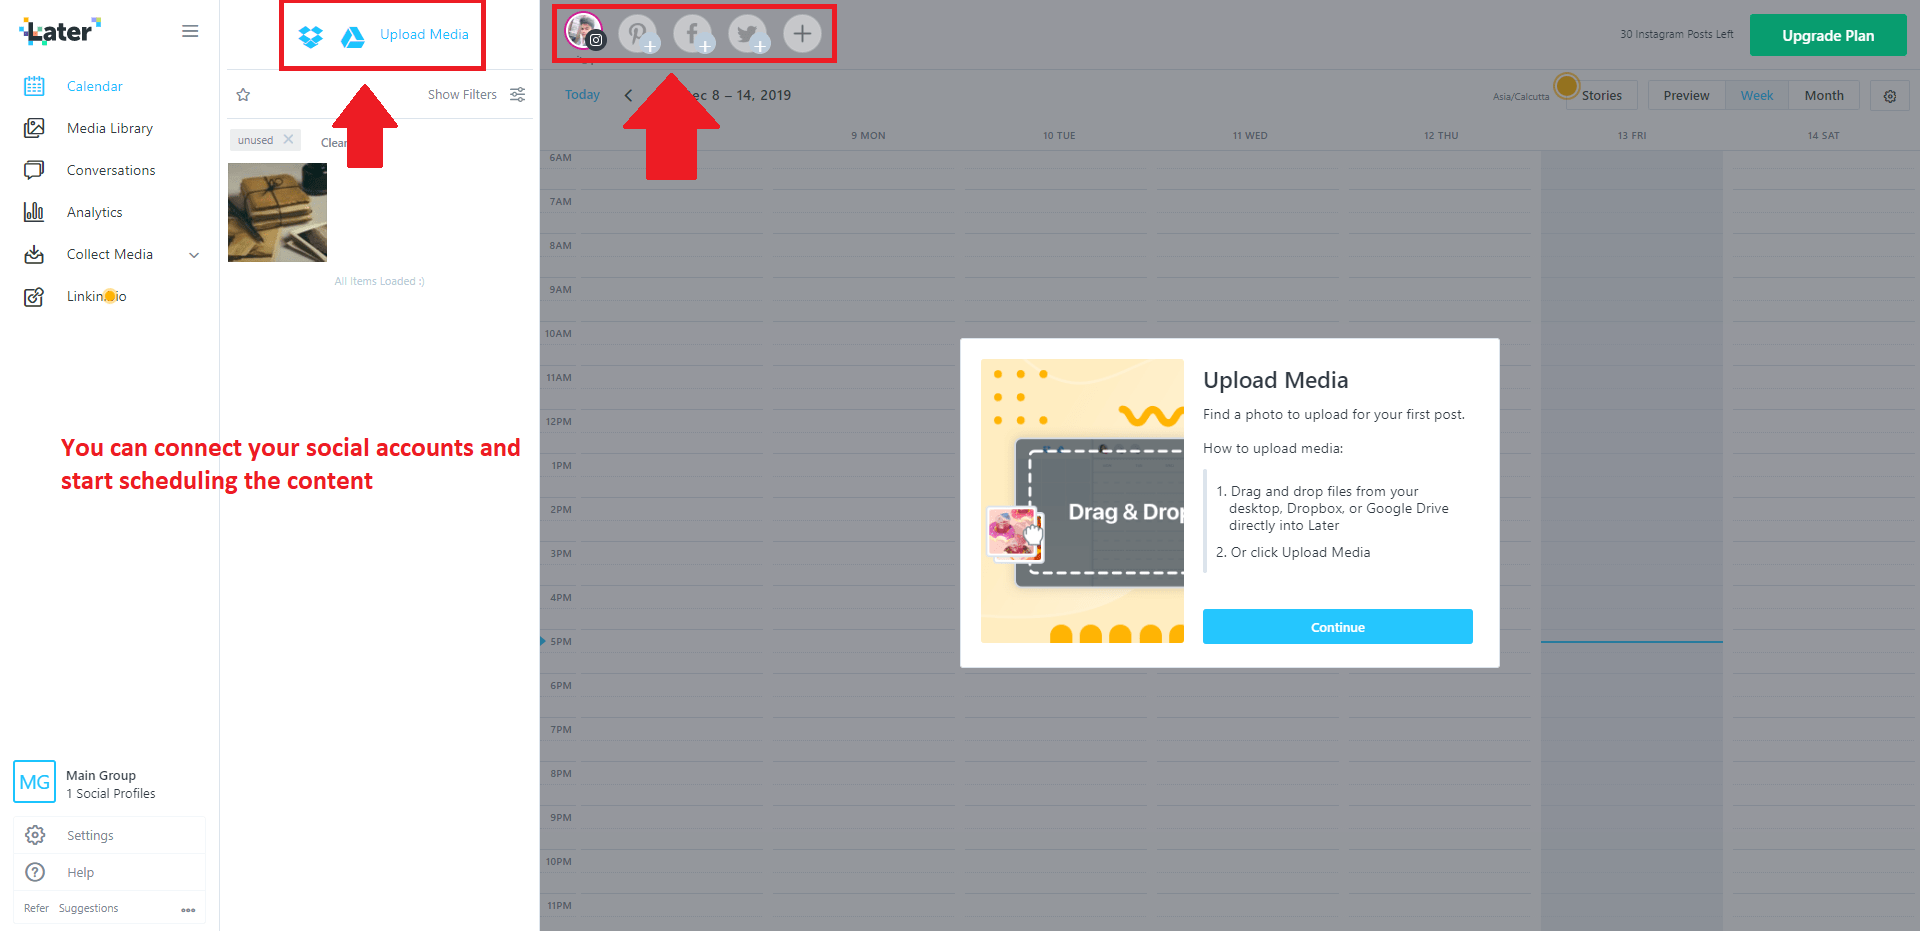
Now you can share the content right from the Later platform.
As you can see, you can schedule the content from the Later website.
3. As you can see in the screenshot given below, explain that you can connect the three major accounts. You can connect on Facebook, Instagram, Twitter, and Pinterest.
4. After connecting the account, it’ll ask you to upload the content from your laptop or PC or you can use your cloud storage to upload the content on the platform.
5. After uploading the content, it’ll ask you to put an attractive caption and hashtags for your Instagram post, and also you can edit the image on the board before sharing it with your followers.
6. As you can see the free plan allows you to connect a single account on each platform so make sure about that.
If you want to use it for personal use then you can start with the free plan and Later you can upgrade as per your need.
7. Now after setting up each thing, it’ll ask you to schedule your post.
You can schedule the content on the platform whenever you want to share it with your audience.
Want to learn more?
Best Apps for Editing Pictures for Instagram
Can I See Who Saved My Posts on Instagram?
3. Hootsuite:
Hootsuite is also an amazing social media management tool.
Using Hootsuite is easy, all you need to create a free account on the platform and start using it.
Either you can use it for free or you can buy a paid plan.
If you want to schedule your social media posts then you can start with a free plan.
Later you can buy the paid plan also.
As you can see in the free plan you’ll get the single user dashboard and 3 social platforms.
You can connect up to 3 social accounts.

So let’s start with the free plan.
Here are the steps for setting up:
1. First, you need to visit the official website of Hootsuite. After reaching the website, you can see at the top of the menu there is an option called a plan.
2. You need to hover the mouse on the plan section and you’ll see multiple plans are there.
You can select the free plan on an initial basis.

3. After that, it’ll ask you to fill up the basic details like your name, email, and password.
After putting up the details, now it will take you to the social profile section where it’ll ask you to connect at least two social profiles.
You can connect up to 3 social platforms.
4. After connecting the accounts, it will take you to the dashboard.
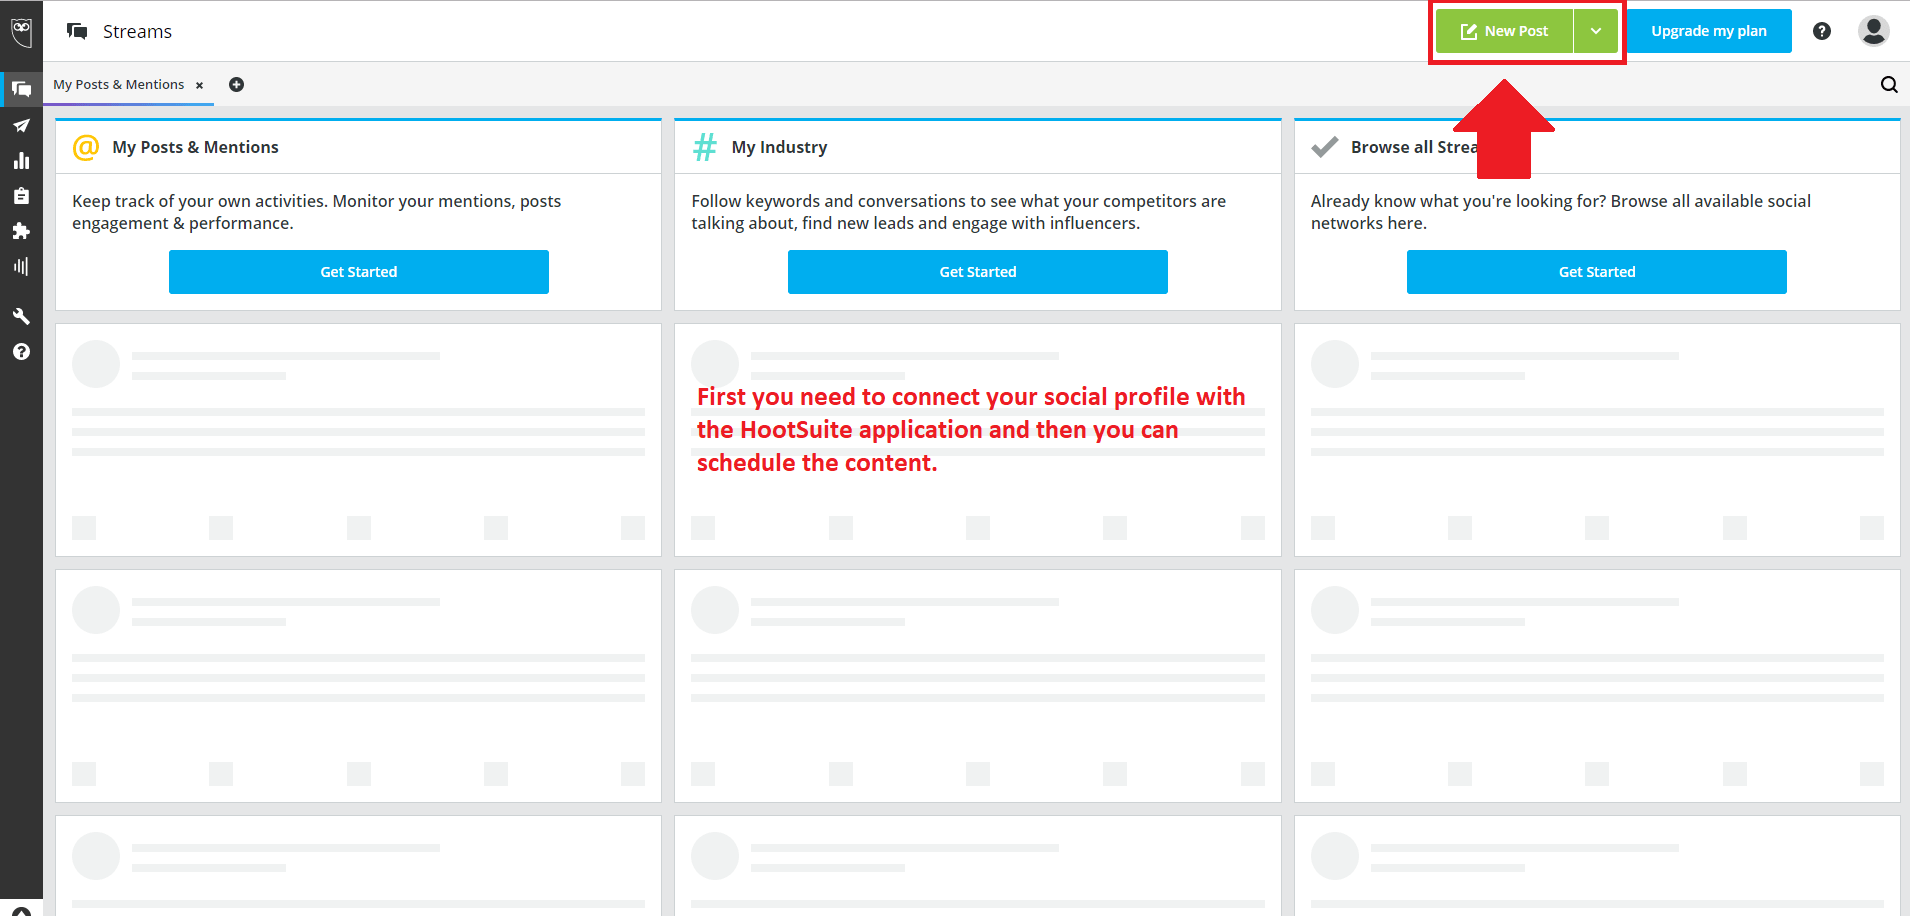
On the dashboard, now you can share things or you can schedule the post.

5. As you can see in the dashboard section, you can create a post.
Creating the post is easy, first, you need to select the social media platform where you want to schedule your post.
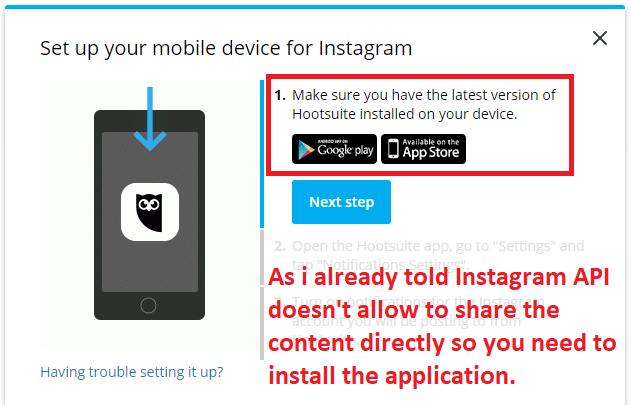
As you can see from the above image, you need to download the application, as I already told Instagram doesn’t allow us to share the content directly with any third-party application.
If you want to share the content on Instagram then you first need to download the application either from PlayStore or AppStore.
6. After that, you need to type some text content as you can see the text box is there.
You can write up to 2000 characters on Facebook and up to 2200 characters on Instagram.
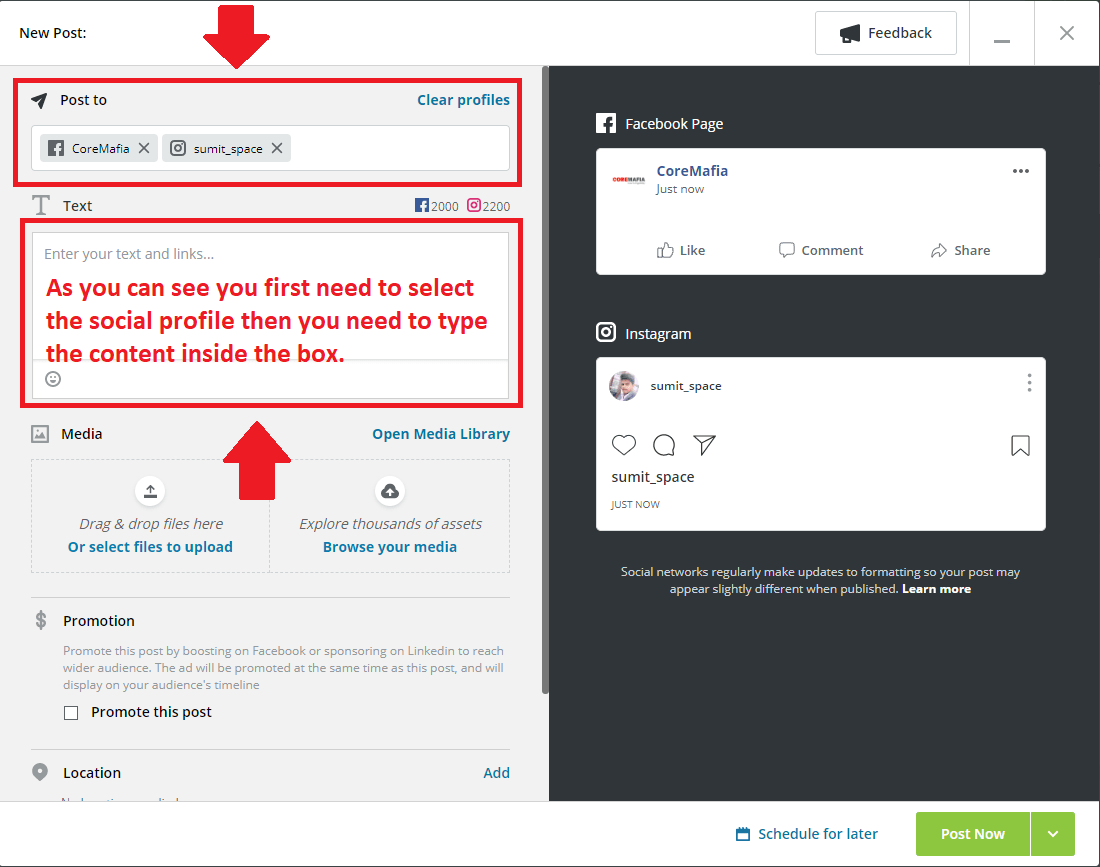
7. After that, you need to upload the media.
As you can see the upload section is there.
You can upload the image or you can browse from the Internet also.
8. Before finalizing the content for social media as you can see there are three options.
You can schedule the content, save it as a draft, post and reuse the content, and last post and duplicate content.
You can choose what suits you best.
9. Suppose we choose, and schedule the content option. Now you can schedule the content when you want to post it.
10. You can also select the location. You can define the location for the platforms of Facebook and Instagram.
You can directly promote the content.
You can decide your target audience also.
Something more for you:
Is There a Way to Find Old Instagram Stories?
How Can I Use Instagram to Promote My Business
4. Facebook Creator Studio:
You can use the Facebook Creator Studio if you don’t have trust in any third-party application.
As we know Instagram owns Facebook so now Facebook has launched a feature where you can post or schedule content for Instagram from the Facebook creator studio.
There are a few conditions for using the Facebook Creator Studio for Instagram.
First, you must have an Instagram business account.
If you have a personal account then you can convert it into either a creator account or you can convert it into a business account.
After converting into a business account now you need to connect your Instagram account to your Facebook page.
Yes, you need to have a Facebook page.
If you have a business, you can create a business Facebook page for that.
After creating a Facebook page now you can connect your Facebook page to your Instagram account.
After connecting Instagram to your Facebook page. Now you need to follow certain steps to schedule the post for Instagram.
Steps to schedule the post for Instagram:
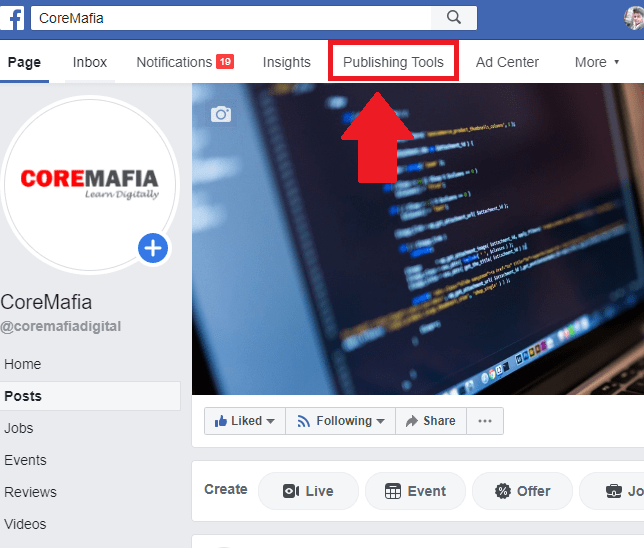
1. First, you need to go to the Facebook page where your Instagram account is connected.
After reaching the Facebook home page you’ll see the publishing tools option at the top of the menu.
2. Now you need to click on the publishing tool.
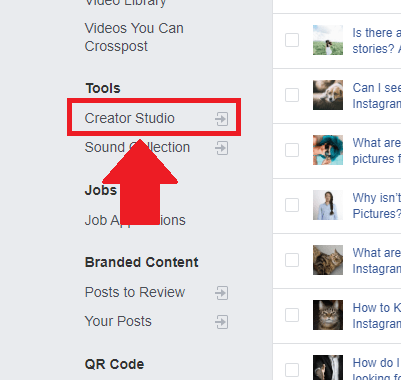
Inside the publishing tool, you’ll see a bunch of options on the left-hand side of the screen.
3. Now you need to click on the creator’s studio tab.
When you’ll click on the creator’s studio tab you’ll see a new window will open.
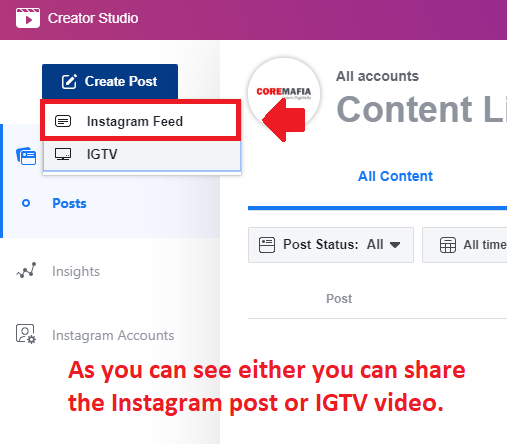
4. Inside the new window, you’ll see at the top the first one is a Facebook icon and the second one is the Instagram icon.
Now you need to click on the Instagram icon.
5. After clicking on the Instagram icon, you can post the content you can schedule the content and a bunch of other options you can explore.
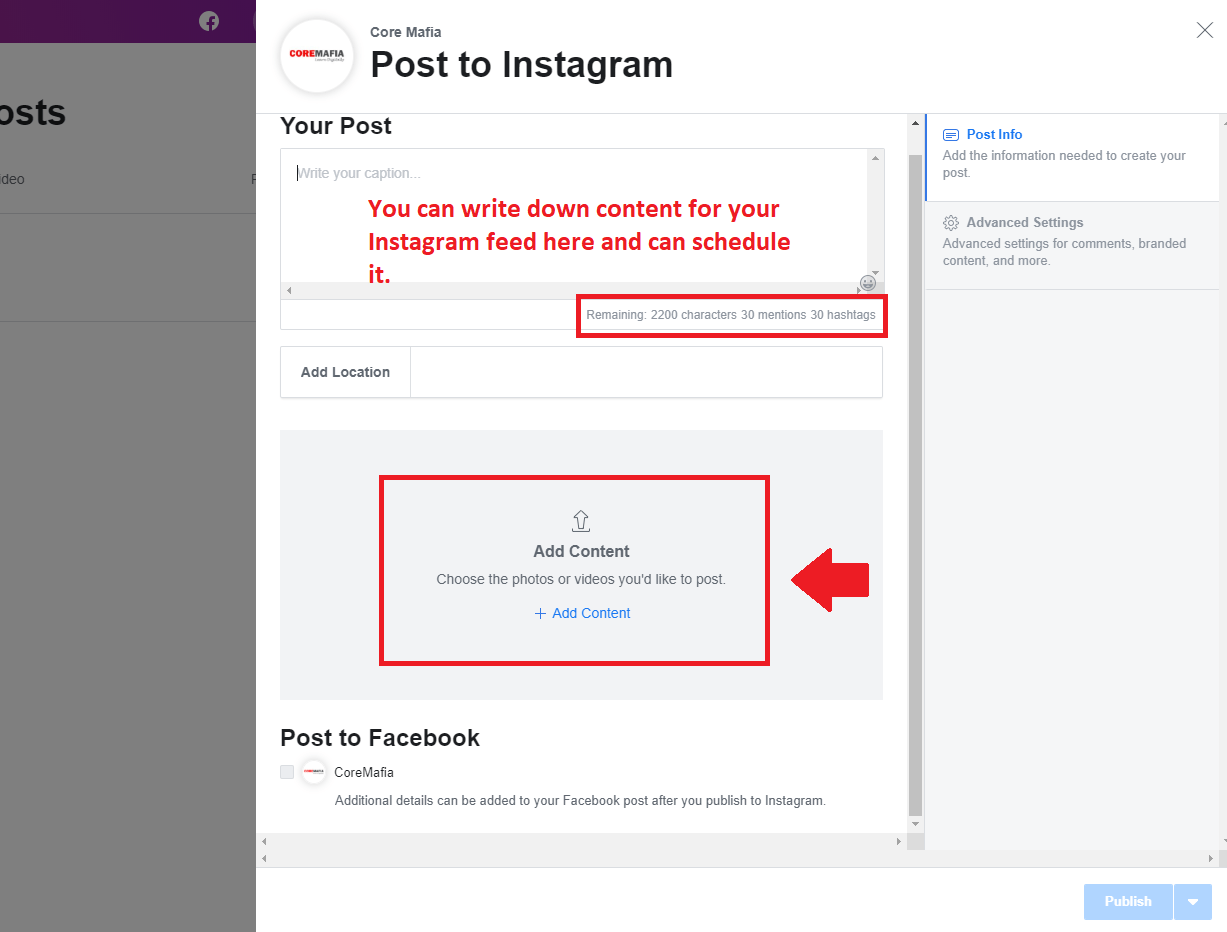
6. Now click on the create post option and you can type the content.
You can see the characters limit is up to 2200, 30 hashtags, and 30 mentions.
7. After creating a post with relevant hashtags and mentions, you can schedule the post or you can directly post it.
You can also do a lot more things with the Creator Studio platform.
You can DM someone with the platform, also you can also see your content.
You can control your Instagram account.
You can check your Instagram analytics.
If you want to explore the features then you must need to visit the Facebook Creators Studio.
You should also learn:
Why Instagram is the Best Social Media
How Do I Find My Instagram Profile Link
Conclusion:
After concluding the session I can say that these are the best possible ways to schedule your posts for Instagram.
If you still have questions then please comment down below.
Scheduling the content is super important because as we know in today’s busy schedule we don’t have much time for planning and posting the content on social media.
We’re busy growing our business and it’s difficult for us to maintain a frequency of sharing quality content on Instagram. Here is the best solution for you.
Use one of the methods for scheduling the content and let me know which one you like the most.